WEB WORKBENCH

Virtualmin + FirewallD and Fail2Ban

A collection of systems, experiments, and builds

Exploring a Virtualmin VPS with FirewallD and Fail2Ban

Today I wanted to delve into Fail2Ban, especially the default configuration that comes with Virtualmin.
Fail2Ban is an additional layer of security that works alongside your firewall. In this case, I am using FirewallD, although Fail2Ban can also work with other Linux firewall solutions such as UFW.

We all know that a firewall is great at blocking ports that should not be open. If a service is not needed, the best security approach is simply not exposing it to the internet.

But what about the ports that do need to be open?

A web server needs HTTP and HTTPS. A mail server needs SMTP. Administration tools such as SSH and Webmin also require access. These services have to remain reachable, which means attackers can also reach them.

This is where Fail2Ban comes in.
Fail2Ban monitors logs looking for suspicious behaviour, such as repeated failed login attempts, authentication failures, or other patterns that indicate abuse. When a matching pattern is detected, Fail2Ban can automatically instruct the firewall to block the offending IP address.

You control how sensitive this protection is by configuring:
How many failed attempts trigger a ban
The time window those attempts must occur within
How long the IP address should be blocked
Which action the firewall should take

The result is a security layer that does not just block unused ports, but actively responds to bad behaviour on the services that you need to keep open.
My Virtualmin Checks

Before changing any settings, I wanted to review what this VPS actually needs exposed to the internet.
The first step in securing any server is understanding its role. There is no point protecting services that should not be running in the first place.
For this VPS:

I am not running mailboxes for users. The mail server is only used for website forms and notification emails.
I only use SFTP, not FTP, so traditional FTP services and passive FTP ports are unnecessary.
I run Apache for websites.
The mail server is outbound only. The only required incoming mail-related access is SMTP port 25, which is needed for communication between mail servers.

With this in mind, the security goal is:

Reduce the number of exposed services
Remove unused services from the firewall
Keep only required access points open
Configure Fail2Ban to protect exposed services
Add escalation protection for persistent attackers

The principle is simple:
If a service is not required, it should not be exposed.

Reviewing the Existing Firewall Configuration

Virtualmin had created a fairly broad FirewallD public zone containing many services that were not required for this server.

The first step was reviewing what was actually needed.

The server role:

Web hosting
Outbound SMTP sending
SSH administration
Webmin/Usermin administration

Services such as FTP, IMAP, POP3 and SMTP submission were not required.

Creating a Disabled FirewallD Zone

Rather than deleting unused firewall entries, I wanted to keep a record of the services that had been removed from public access.
I created a separate FirewallD zone called:
disabled
The idea was not to use this as an active network zone, but as a place to keep a record of services that I had intentionally removed from the public firewall configuration.
One limitation I found in Webmin is that you cannot simply move existing firewall rules from one zone to another through the interface. Because of this, I decided to edit the FirewallD XML configuration files directly.
Services moved to the disabled zone included:
* FTP
* Passive FTP port range
* POP3
* POP3S
* IMAP
* IMAPS
* SMTP submission (587)
* SMTPS (465)
* Default SSH ports (22/2222)
* Unused discovery services
This approach gives me a history of what has been disabled. If I ever need one of these services again, I have a reference of what was previously removed and can add it back to the public zone if required.
My approach was to disable and document rather than delete and forget.
Final Public FirewallD Zone

After cleanup, the public zone was reduced to only required services.

Allowed:

* SMTP port 25
* HTTP
* HTTPS
* SSH on custom port 22223
* Webmin ports
* Usermin port

Firewallid public (allowed) xml

Public
For use in public areas. Only required incoming connections are accepted.

And disabled xml

Unused services and ports disabled during VPS hardening.

Reviewing Fail2Ban Configuration

A short intro before the body. Click any field to edit.

If you open Fail2Ban Intrusion Detector in Webmin, the first place to look is the default configuration.
At the bottom of the page, you can edit the default settings that apply across your jails.
The main options are:

Matches before applying action
This controls how many times an event can occur before Fail2Ban takes action.

My setting:
Matches before applying action:
5
Meaning an IP address must trigger the rule five times before it is banned.

Maximum delay between matches
This controls the time window in which those attempts must happen.
My setting:

Maximum delay between matches:
10 minutes
For example, if an IP fails five times within ten minutes, Fail2Ban will apply the configured action.

Default ban time
The original default was:
10 minutes
I changed this to:
60 minutes
This gives a longer block period for general services while still avoiding excessive lockouts.

After changing the defaults, I reviewed the individual jail settings to see which services Virtualmin had enabled.
This is where you can fine-tune protection for each public-facing service.

For example, my main service requiring attention was Postfix, because SMTP port 25 is exposed to the internet.
Opening the Postfix jail allows individual rules to be adjusted. For mail-related protection, I increased the ban settings:

Maximum delay between matches:
600 minutes

Ban time:
600 minutes
The reason for this is that mail server abuse is usually automated. A short ban often just results in the same attacker returning shortly afterwards.
Fail2Ban allows each jail to have its own settings, so you can have:
Shorter bans for administrative services like SSH to avoid accidental lockouts
Longer bans for automated services such as SMTP attacks

You can also disable any jails for services that are not running.
For example, on this server:
->Dovecot was disabled because there are no hosted mailboxes
->ProFTPD was disabled because SFTP is used instead of FTP
The aim is to only protect services that are actually running and publicly accessible.
For now i have left all enabled.

Enabling Recidive Protection

The Fail2Ban recidive jail was not enabled by default, so I opened it from the same jail list and reviewed the configuration page.
Unlike normal Fail2Ban jails, recidive does not monitor a service such as SSH, Postfix, or Webmin directly.
Instead, it watches Fail2Ban itself:
/var/log/fail2ban.log

It looks for IP addresses that have already been banned multiple times across different jails.
For example:
An IP attacks SSH and gets banned
The same IP later attacks Postfix and gets banned again
The same IP triggers Webmin protection
Recidive recognises this pattern and treats the IP as a persistent offender.
Configuration used:
Find time:
1 day
Max retries:
5
Ban time:
1 week

This means:
If an IP address triggers five Fail2Ban bans within one day, it receives a longer one-week ban.
The action was configured using:
firewallcmd-rich-rules

This keeps the protection integrated with FirewallD and allows persistent attackers to be blocked at the firewall level across services.
The escalation process:
Attack

Service jail detects abuse

Temporary ban applied

Fail2Ban records the ban event

Recidive detects repeated behaviour

Longer firewall ban applied

The advantage of recidive is that it does not matter which service the attacker targets. It looks at the bigger picture and responds to repeated malicious activity across the server.

Configured — Now Sit Back and Watch

To watch what is happening live, connect to your server using SSH and run:
sudo tail -f /var/log/fail2ban.log
Now you can watch as IP addresses attempting suspicious activity are detected and sent to the naughty step.
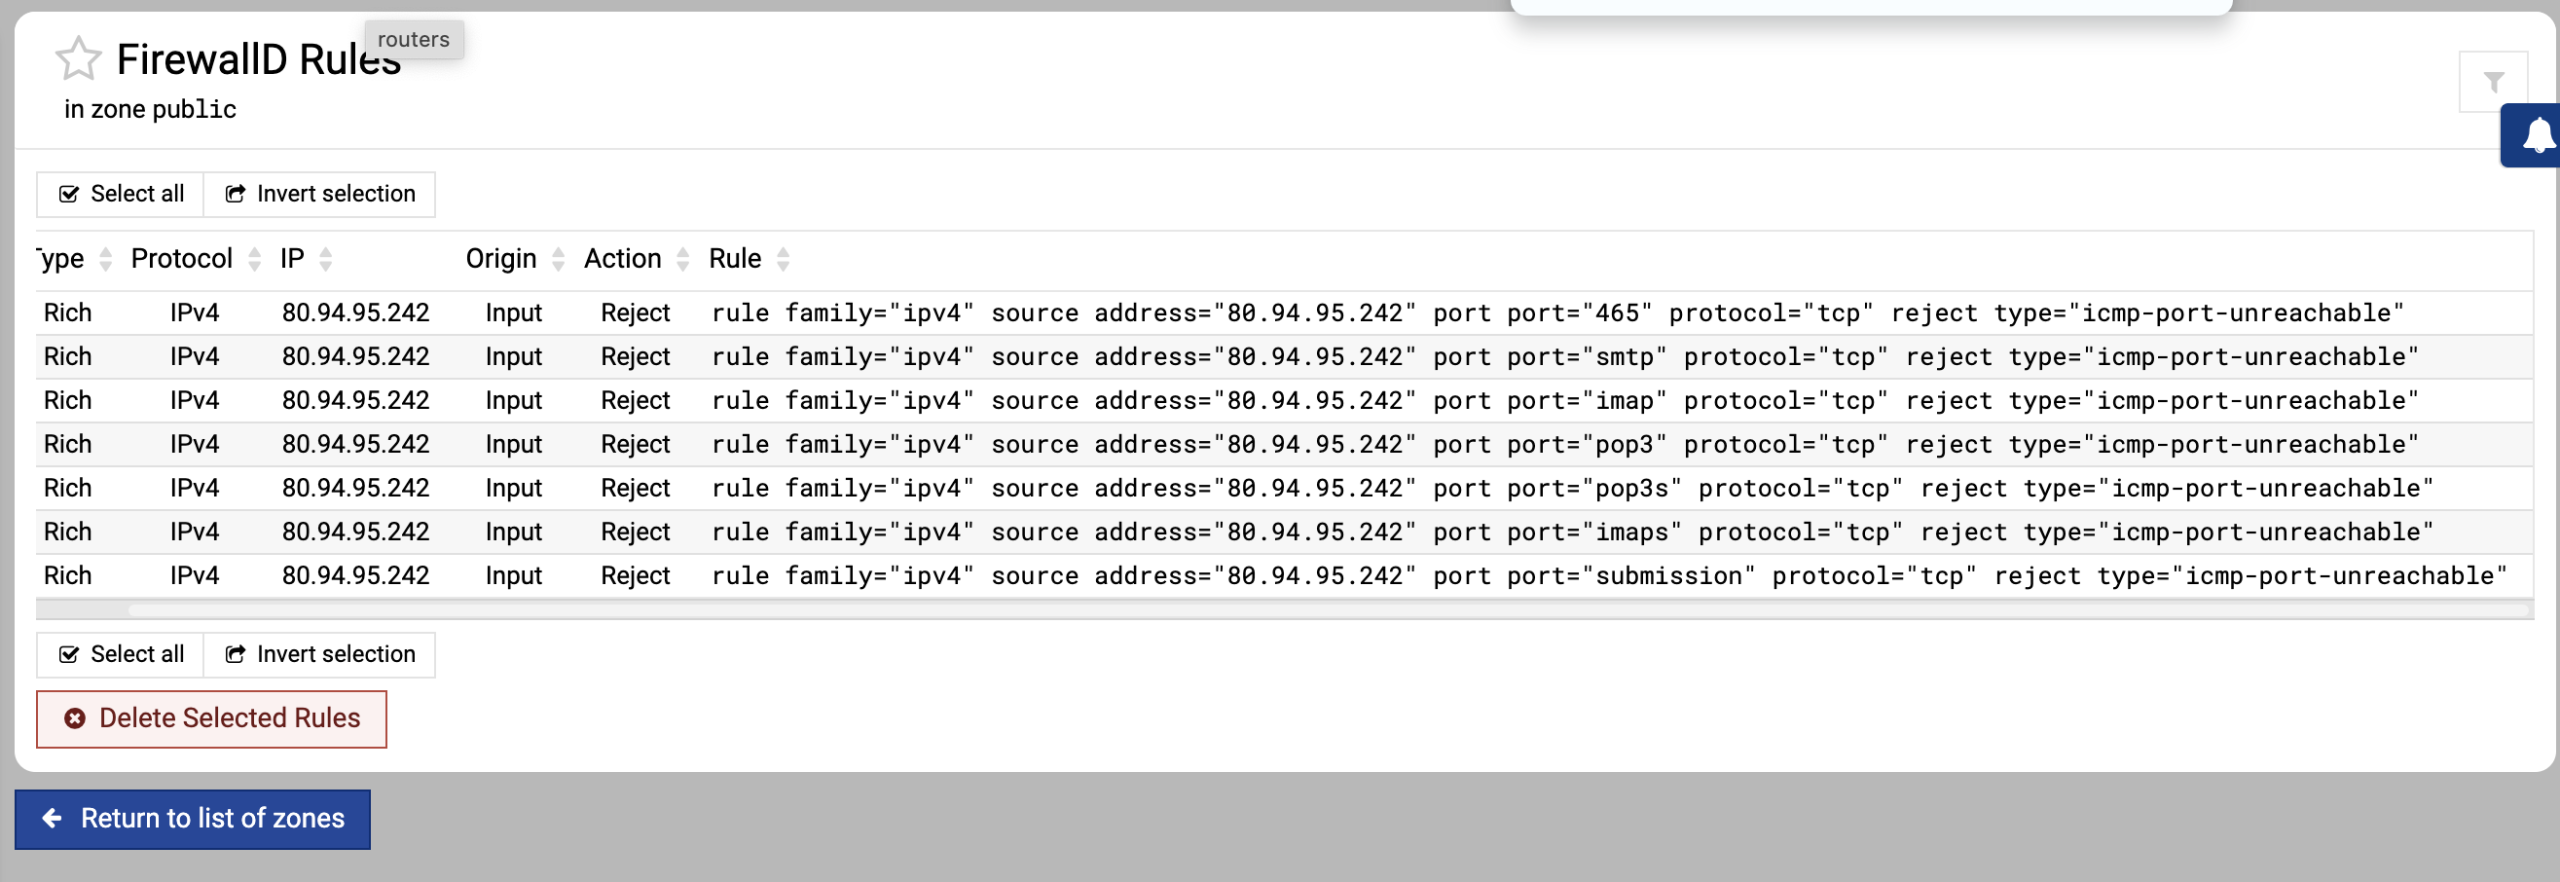
Open FirewallD in Webmin, click the List FirewallD Rules button, and you can see the new rich rules appear as Fail2Ban automatically instructs FirewallD to block the offenders.
My FirewallD rich rules filling up with blocked attackers:
Firewalld rich rules created from fail2ban

Fail2Ban and FirewallD are now working together — Fail2Ban is the security guard watching the behaviour, and FirewallD is the door keeping the troublemakers outside.
This is better than Elvis' Jailhouse Rock for a Linux admin...
This is Fail2Ban Jailhouse Rock. 🎸🐧

Found This Useful?

If you found this useful, please consider sharing it.

InfoAbout Cookie infoContactFAQsTermsDisclosure